Drawing Anime Face with Simple Segmentation Mask
Originally posted on My Medium.
Demo
This is a short demo. The full video is down below at the bottom of the article.
Objective
The objective of this project is to build a deep-learning model to generate Anime face portraits from segmentation masks.
In this project, I will first manually annotate a small set of images. Then I will use data augmentation and a U-Net model to multiply the number of segmentation masks to build a dataset. Finally, I will train a GauGAN model for synthesizing anime faces from segmentation masks.
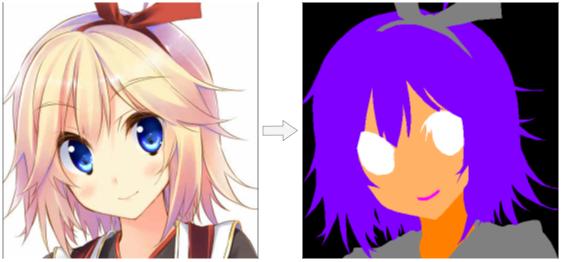
1. Semantic Segmentation
Semantic segmentation is the process of assigning a label (aka class id) to each pixel in an image. The outcome of it is a segmentation mask which is an array of size height * width with every pixel containing a class id.
1.1 Dataset
Before jumping into the image generation task, we need a dataset of segmentation masks for training the generative model to translate the mask to an image.
Unfortunately, I could not find any anime faces segmentation dataset on the internet. Nonetheless, there is an anime portraits (512 x 512px) dataset available at Danbooru2019-Portraits. So I decided to annotate my own segmentation masks from the Danbooru portraits.
1.2 Annotation
To annotate the images, we have to decide the classes. My original idea was a list of 15 classes:
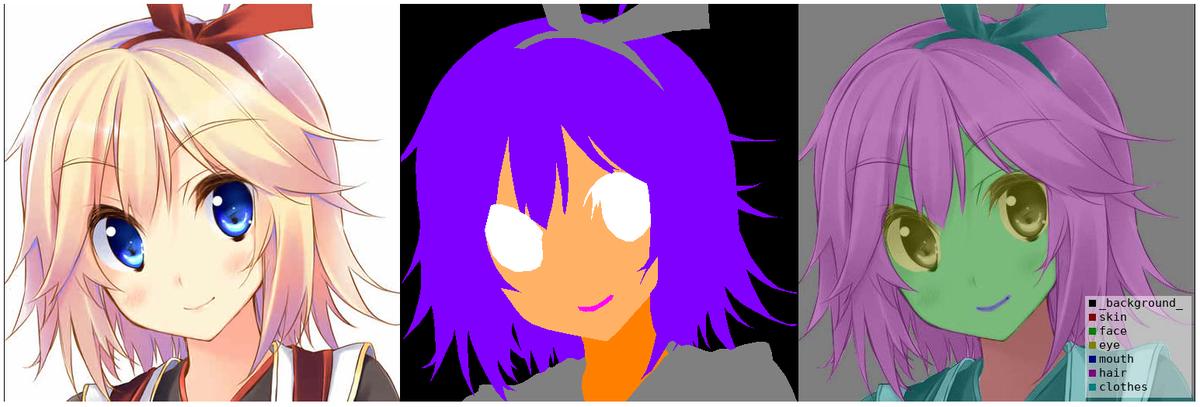
background, body, ear, face, eyeball, pupil, eyelash, nose, mouth, hair, hair_accessory, eyebrow, glasses, clothes, handBut later I reduced it to 7 classes for simplicity, and the final class list is the following:
background, skin, face, eye, mouth, hair, clothesThere are many different annotation tools out there, the one I used was labelme.
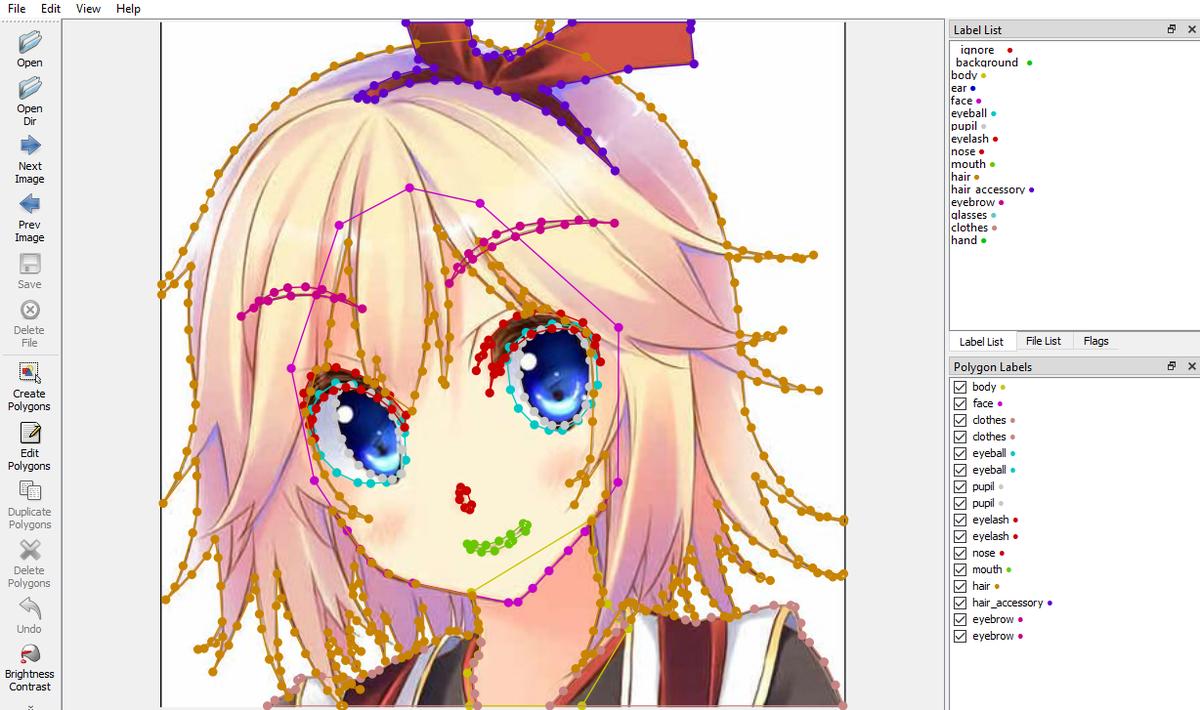
After weeks of hard work on this tedious job, I managed to annotate 200 images and stopped before it breaks my finger…
1.3 Data Augmentation
Of course, 200 annotated images are not enough for us to train our networks. We need to increase the size of the dataset using the data augmentation technique.
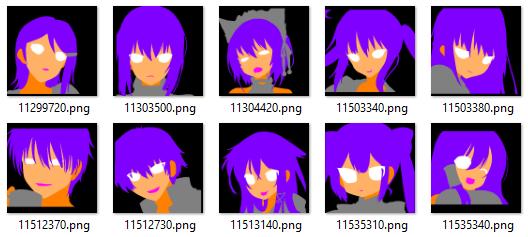
By rotating, mirroring, and warping the images randomly, I generated 3000 more data out of those 200 samples. In other words, now I have 3200 data.
However, these data are highly repeated in terms of content and style since they are augmented from only 200 samples. In order to train a network to translate segmentation masks to high-quality and diverse anime faces, we need more than just 200 + 3000 data points. Therefore, I will first use these data to train a U-Net model to learn the translation from anime faces to segmentation masks. And then I will feed the entire Danbooru portraits dataset into the trained U-Net model to generate more segmentation masks of different faces.
1.4 U-Net
U-Net was originally introduced to segmentize medical images for diagnosis. It does a really great job in precise segmentation by using skip connections to address the problem of information loss happening in traditional FCN (Fully Convolutional Network).
The architecture of U-Net bears a resemblance to Autoencoder, but with extra concatenation layers from the downsampling side to the upsampling side.
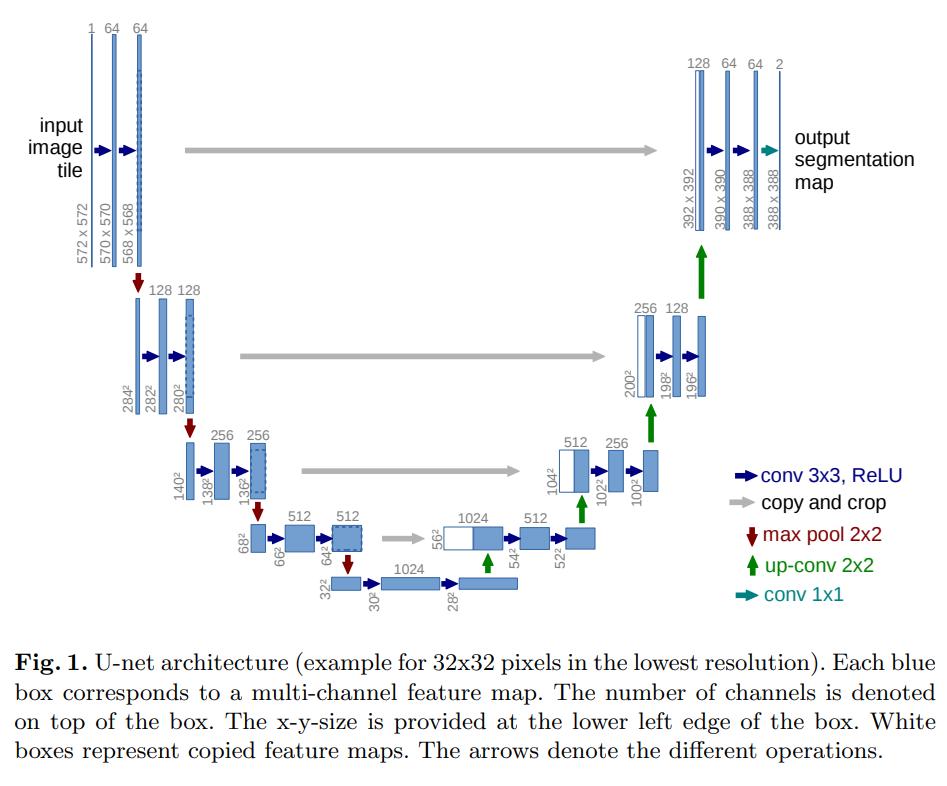
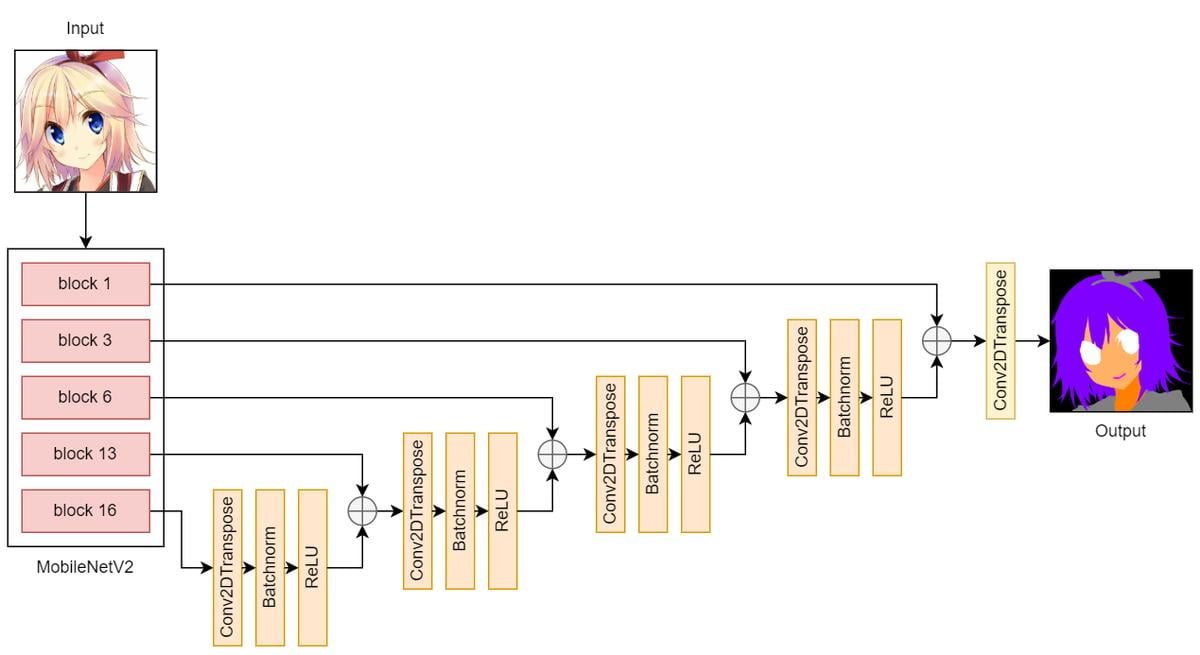
In the downsampling part, I used a pretrained MobileNetV2 to extract features from the input image. In the upsampling part, I used blocks consisting of Conv2DTranspose, Batchnorm, and ReLU layers.
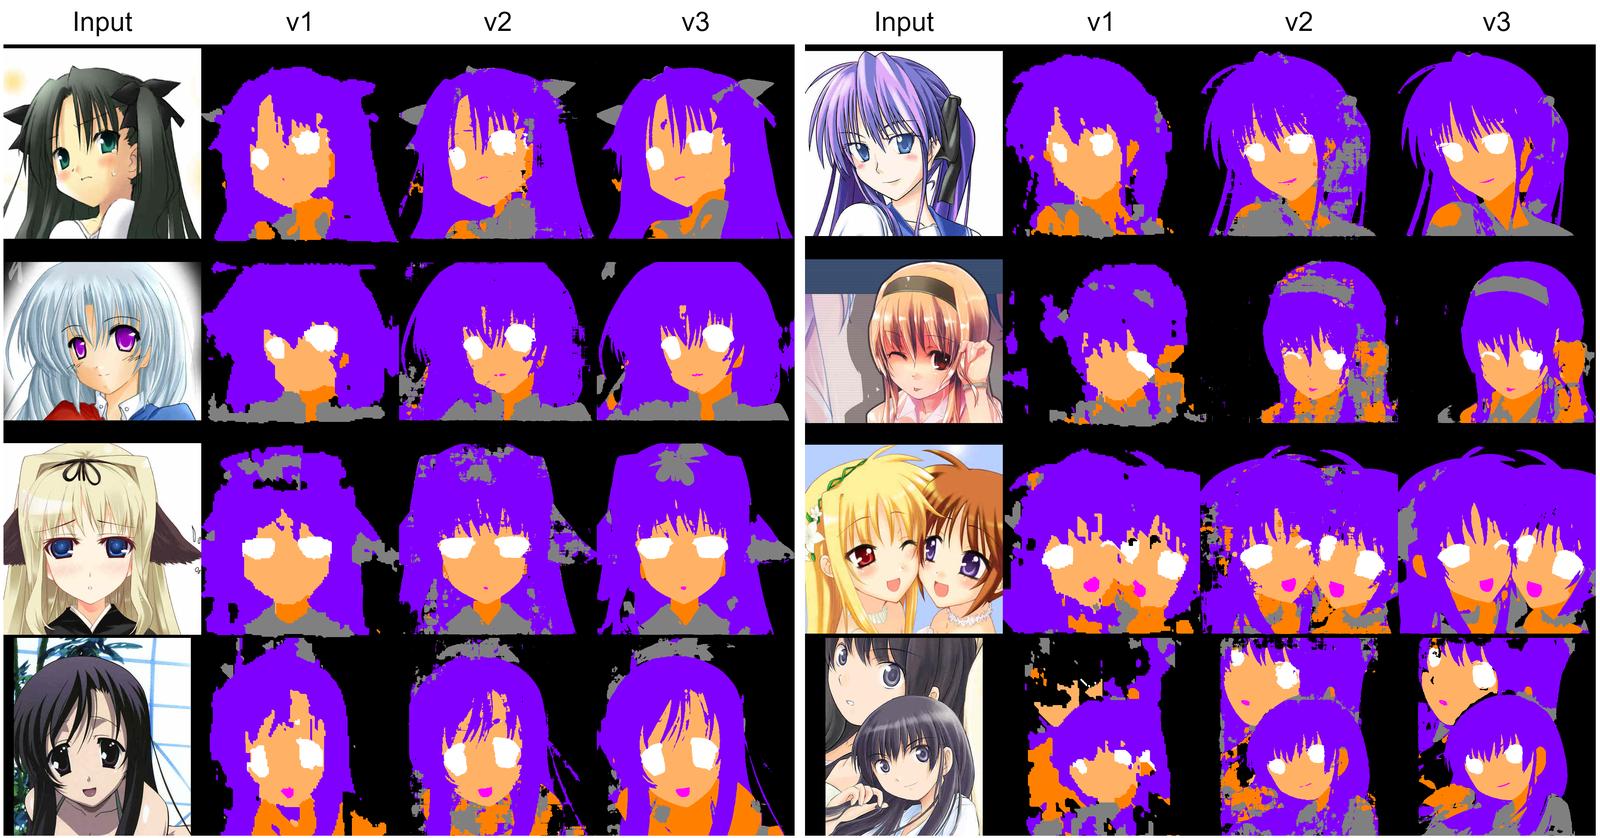
In my U-Net version 1, the input and output sizes were 128 x 128px. The trained model did learn a pretty good mapping from anime faces to segmentation masks. But since I would like to have 512 x 512px inputs and outputs in my later synthesis model, I resized the U-Net outputs to 512 x 512px with interpolation. However, the results looked pixelized and it failed to capture some classes that appeared in small regions (e.g. mouth).
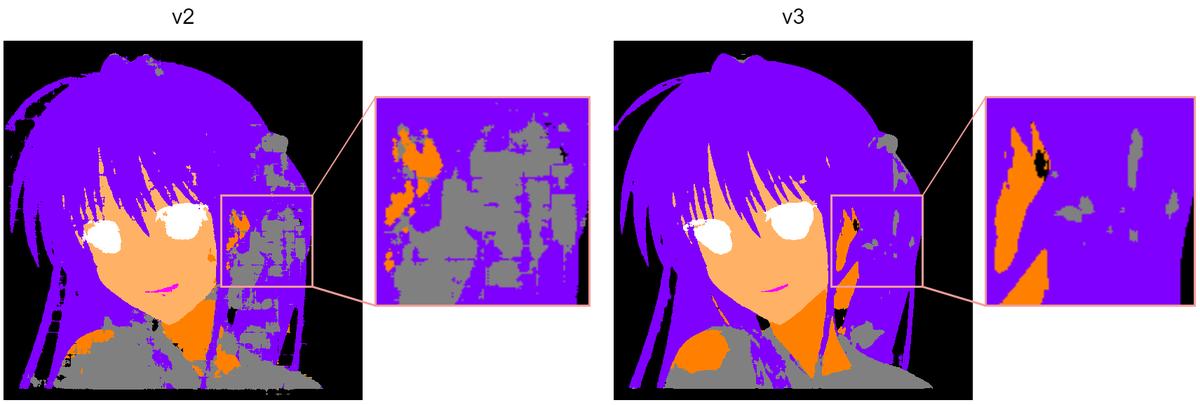
In version 2, I simply changed the input and output sizes to 512 x 512px (I didn’t do this in the beginning because I didn’t want the output to be noisy and filled with random dots in confusing regions in the image, like clothes). As I expected, the outputs of v2 were noisy. Though, they looked better than those of v1.
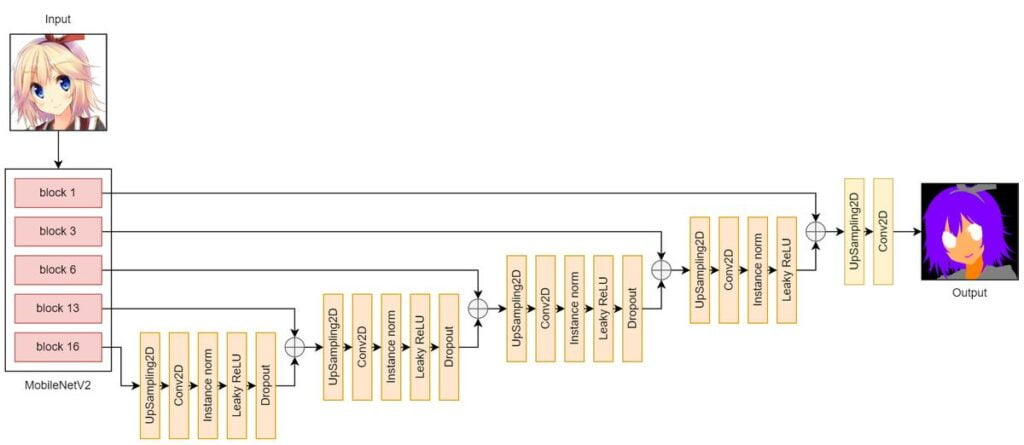
In version 3, I tried to alleviate the noises and checkerboard artifacts by replacing Conv2DTranspose layers with UpSampling2D layers. The results are now way better than the ones in v2. There are fewer noises and fewer checkerboard artifacts.
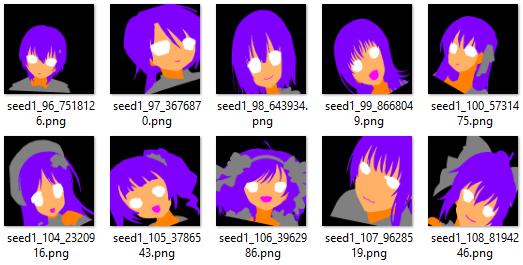
Finally, I fed the entire Danbooru dataset into the U-Net v3 to build my segmentation masks dataset.
2. Semantic Image Synthesis
Now, we have the segmentation masks dataset, it’s time to dive into the main task — Semantic Image Synthesis, which is nothing but a fancy name for the translation from segmentation masks to realistic images as I said earlier.
2.1 GauGAN
GauGAN was developed by Nvidia to synthesize photorealistic images from segmentation masks. On their showcase website, they demonstrate how GauGAN does a fantastic job of generating realistic landscape images from just a few strokes.
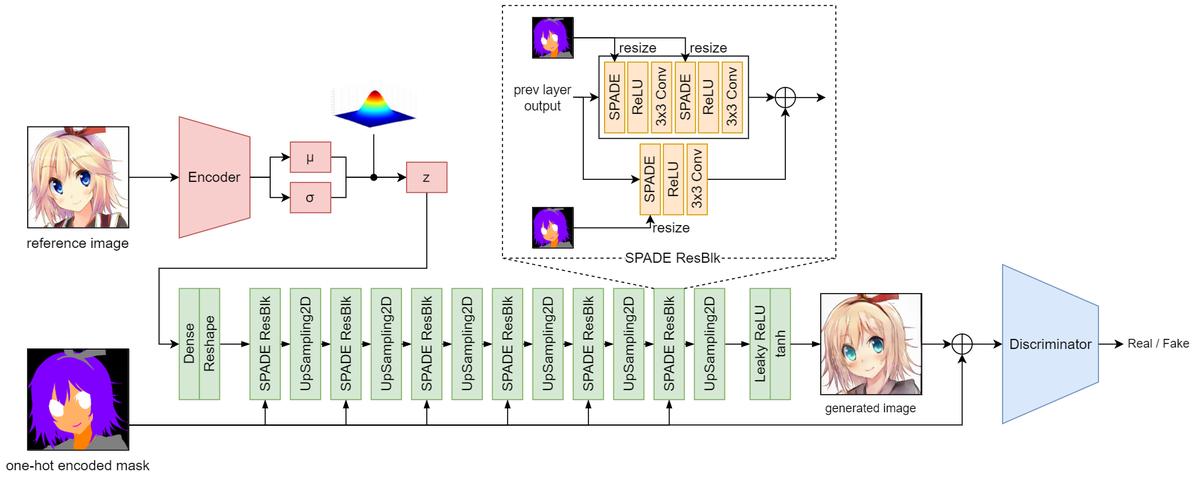
The above diagram shows the architecture of the GauGAN model. The green blocks altogether represent the generator. The discriminator is a PatchGAN.
2.2 SPADE
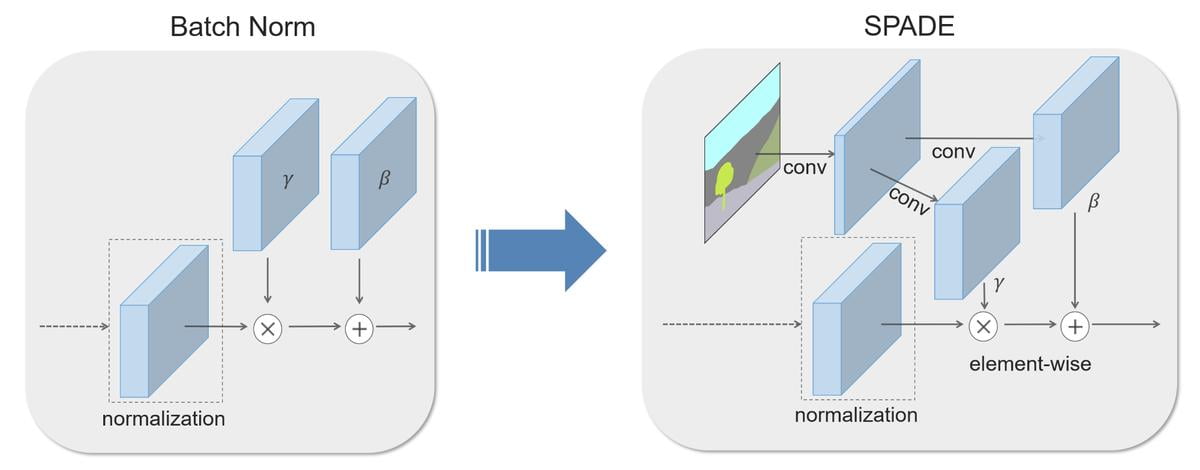
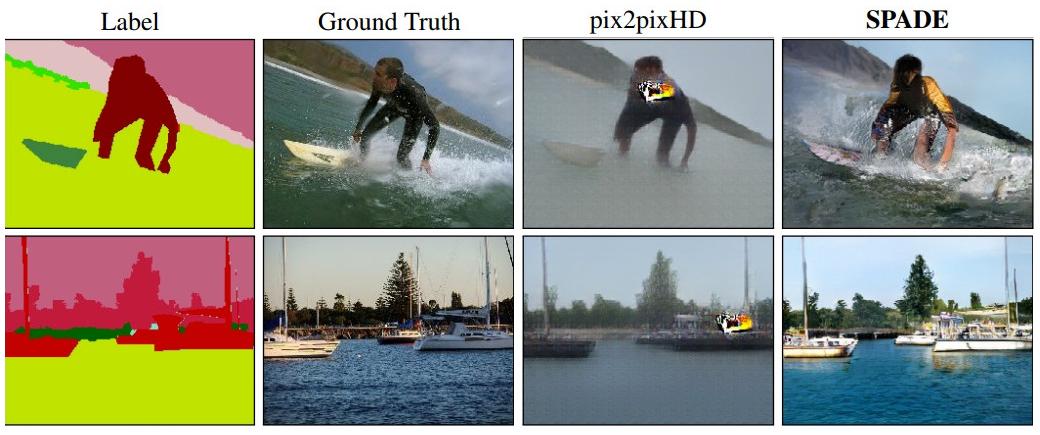
The core of GauGAN is the SPADE (Spatially-Adaptive Denormalization) module, which is a normalization layer modified from Batch Norm. It was designed to overcome the challenge in pix2pixHD: losing semantic information in large areas having uniform class ids.
This is solved by introducing Conv layers to batch norm such that it has different sets of parameters (β, γ) that are conditional on the segmentation masks and will vary with respect to different regions. This means that SPADE allows the generator to learn more details in the region of uniform labels.
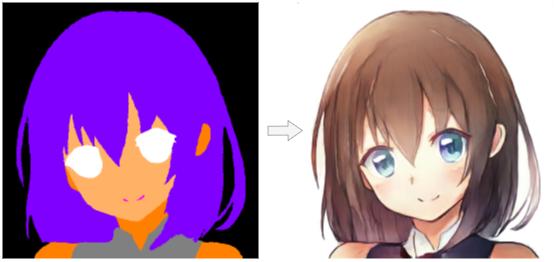
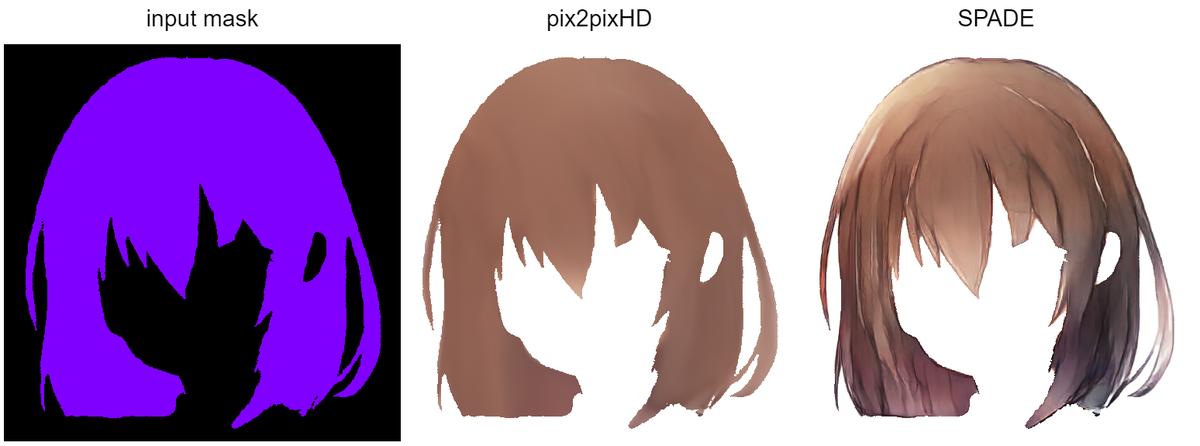
So, in our problem, the generated image would probably look like this:
2.3 Pretrained Encoder
The encoder is actually optional since one can directly sample z (latent vector) from a Gaussian distribution without any inputs (just like vanilla GAN). I included the encoder because I want to style the generated images with reference images.
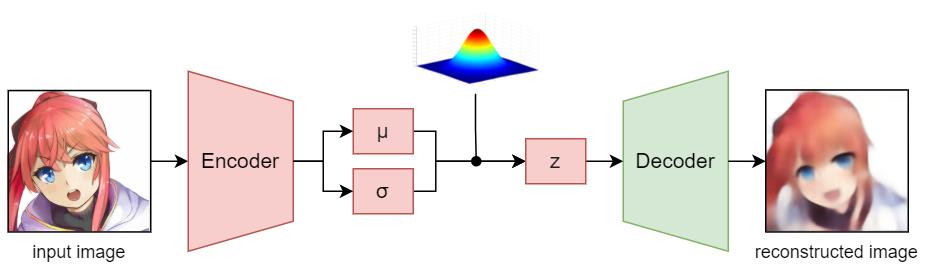
Since training the GauGAN along with the encoder is unstable and requires more time and resources, I trained my encoder in advance using a VAE and then I used the pretrained encoder to sample z in the training process of the GauGAN model.
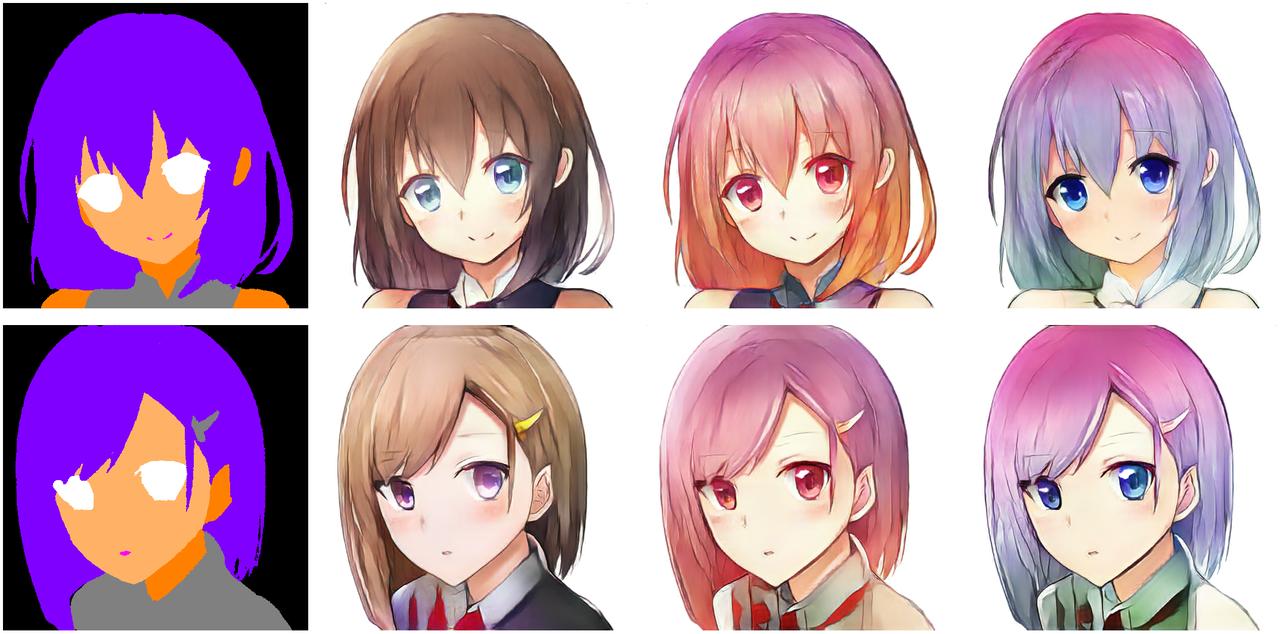
2.4 Results
The followings are the results of generated images from different segmentation masks and reference images.

2.3 Latent Attribute Vectors
Apart from using reference images to control the output image styles, we can also directly manipulate the latent vector z to do so. To achieve this, we need to first find out the attribute vectors in the latent space.
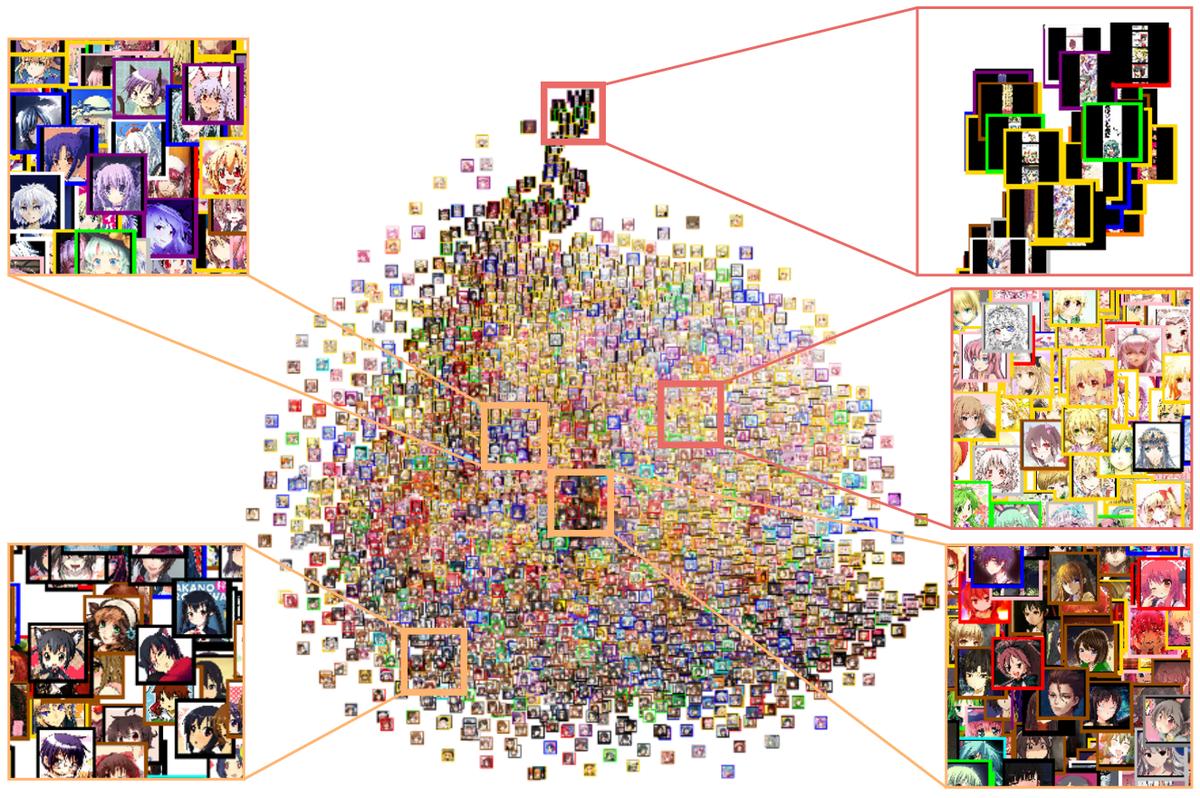
One of the most important attributes of anime characters’ faces would be hair color. However, since the dataset does not come with tags of hair colors, I have to label them by myself using i2v, which is a library for estimating illustration tags. We can then visualize the latent space along with the estimated tags by projecting the latent vectors of sample images onto a 2D space using t-SNE.
Finally, by calculating the distance and direction between latent vectors of different tags, we can obtain the attribute vectors. The following animation demonstrates the transformation between hair colors using the extracted attribute vectors.
3. GUI
I created a GUI using the python tkinter library for editing generated images and segmentation masks. The following is the demonstration video:
Conclusion
There is still room for improvement in this project, especially in the semantic segmentation model (U-Net) and the semantic image synthesis model (GauGAN). The following is a list of things to do in the future:
- Search for better model architectures to obtain more accurate segmentation masks from raw images
- Improve the GauGAN model to eliminate noises that appeared in hair regions
- Train a generative model to generate random segmentation masks
If you are interested in Anime and deep learning, please check out my other articles and follow me for upcoming content.
References
[1] D. Gwern Branwen, “Anime Crop Datasets: Faces, Figures, & Hands”, Gwern.net, 2022. https://www.gwern.net/Crops#danbooru2019-portraits
[2] “ wkentaro/labelme: Image Polygonal Annotation with Python (polygon, rectangle, circle, line, point and image-level flag annotation).”, GitHub, 2022. https://github.com/wkentaro/labelme
[3] O. Ronneberger, P. Fischer and T. Brox, “U-Net: Convolutional Networks for Biomedical Image Segmentation”, arXiv.org, 2022. https://arxiv.org/abs/1505.04597
[4] Odena, et al., “Deconvolution and Checkerboard Artifacts”, Distill, 2016. http://doi.org/10.23915/distill.00003
[5] “The NVIDIA AI Playground”, NVIDIA, 2022. https://www.nvidia.com/en-us/research/ai-playground/
[6] “NVlabs/SPADE: Semantic Image Synthesis with SPADE”, GitHub, 2022. https://github.com/NVlabs/SPADE
[7] “Semantic Image Synthesis with Spatially-Adaptive Normalization”, Nvlabs.github.io, 2022. https://nvlabs.github.io/SPADE/
[8] “rezoo/illustration2vec: A simple deep learning library for estimating a set of tags and extracting semantic feature vectors from given illustrations.”, GitHub, 2022. https://github.com/rezoo/illustration2vec


